Saturday, June 16, 2012

Wholemeal Ginger Crunch

from Jo Seagar's book The Cook School Recipes

This is a delicious slice, almost addictive, that I've been making lately - as with all Jo's recipes it is really easy with spectacular results.Extra nice because of the chopped crystallised ginger and wholemeal flour in the base.

Recipe

Preheat the oven to 180 degrees Celsius and line a 20cm X 30cm slice tin with baking paper

Base
150 g butter
2 tablespoons golden syrup
3/4 cup brown sugar
3/4 cup long thread coconut
1 1/2 cups rolled oats
3/4 cup wholemeal flour
2 teaspoons baking powder
3 teaspoons ground ginger
1 cup chopped crystallised ginger


Melt butter, golden syrup and brown sugar over a low heat. Mix the dry ingredients in a bowl and pour in melted ingredients. Mix all together and press the mixture into the prepared tin.

Bake for 20 minutes.

Icing/Topping
100 g  butter
6 tablespoons golden syrup
2 1/2 cups icing sugar
3 teaspoons ground ginger

Melt butter and golden syrup, beat in ginger and icing sugar. Pour over still-warm base.
Chill before cutting into 24 pieces (I got 32 healthy size pieces!!)

Enjoy !


Saturday, May 26, 2012


THE DARING BAKERS' MAY 2012 CHALLENGE: Challah Back, Y'all!


May’s Daring Bakers’ Challenge was pretty twisted – Ruth from The Crafts of Mommyhood challenged us to make challah! Using recipes from all over, and tips from “A Taste of Challah,” by Tamar Ansh, she encouraged us to bake beautifully braided breads.

I got to the challenge really late this month but had been keeping an eye on the postings during the month. Lots of DBers were reporting that this challenge was easier than it looked and it was so much fun and that's the truth.


Ruth had given a lot of background about the history and cultural meaning around Challah which can be found here, there and over there.She had even made several videos on how to braid the dough into loaves,round loaves and rolls.


I used half of the Honey Challah Recipe


Saturday, April 28, 2012


THE DARING BAKERS' APRIL 2012 CHALLENGE: 

Armenian Nazook & Nutmeg Cake


The Daring Bakers’ April 2012 challenge, hosted by Jason at Daily Candor, were two Armenian standards: nazook and nutmeg cake. Nazook is a layered yeasted dough pastry with a sweet filling, and nutmeg cake is a fragrant, nutty coffee-style cake. 


I only got to making the Nutmeg Cake (without the nuts). It's quite a plain looking cake but has a great flavour and was just fine without the nuts. Also it is really easy to make in a stand mixer. Follow the instructions for the food processor version - a stand mixer will rub butter into flour - remove half the mixture as per the recipe and continue mixing the other half in the bowl.


Here is the link to the recipe

Try this cake - it is wonderful !


Thursday, January 26, 2012

THE DARING BAKERS' JANUARY, 2012 CHALLENGE: BACK TO BASICS: SCONES (A.K.A. BISCUITS)


Scones Scones and More Scones


Audax Artifex was our January 2012 Daring Bakers’ host. Aud worked tirelessly to master light and fluffy scones (a/k/a biscuits) to help us create delicious and perfect batches in our own kitchens!

Scones - loved this challenge - have been brought up making scones as many my age in NZ have - they are a staple. One of the first things most of us learned to bake in school cooking lessons too.
Watching the video of the host's lovely sister brought back memories of my chldhood in 1960s NZ - it was just like; watching Mum, watching my aunties, watching my friend's mothers, watching the neighbourhood women "knock up a batch of scones" - probably not PC to say that now.

I know women who are now in their 70s and 80s who make the most wonderful scones and don't even measure anything - I guess decades of practise makes perfect - they are amazing to watch - just shake the flour out of the bag - scoop some butter off the block and they are away - pour the milk in from the bottle/carton - usually cut them into squares or rectangles - glaze them with milk - into a "hot" oven and voila !- an awesome batch of scones.

I tried the challenge basic recipe and also made three others that are tried and true - one especially for people who don't care for "rubbing in".

First batch of challenge Basic Scones (a.k.a. Basic Biscuits) made- turned out pretty well as scones go - nice texture and very light, not a hint of baking powder taste. Well recieved by home tasters

In 2011 there was a TV show screened here in NZ called The Great British Bake Off and in one of the episodes the contestants had to make scones and I took a few notes from the judges - one in particular said - "only egg wash or glaze to the edge of the top - don't let it drip down the sides as this prevents rising or causes uneven rising" - for what it's worth


Healthy Food Guide Scones

These next scones are made from a recipe out of the New Zealand Healthy Food Guide - meant to be a slightly more healthy version of a scone - use margarine, low fat milk and yoghurt. Whether or not they are healthier is a discussion for another day - but why I use this recipe is that the margarine is really easy to rub in and they make a fantastically light scone. I've also used them at school for when I take cooking lessons with my class - they are fail-proof. It is a very wet mixture, I wouldn't even attempt to use a cutter, just a sharp knife. This recipe halves easily. Link to recipe below


NZ Healthy Food Guide Plain Scone Recipe

Griddle - Girdle SconesMy Mum often made "girdle" scones for us to have as morning tea in the weeknd or during school holidays / vacations - good filling food for active kids ! As you don't need an oven they are great for camping etc. If you don't have a griddle an electric frypan does the job. There's a bit of history around gridle / girdle - this posting in Lisa's (Sunday Hotpants) blog tells the story really well (go to Index and look under scones for Girdle Scones). I used her recipe which is a fairly stock standard one for griddle/girdle scones in Zew Zealand.


Girdle Scones
- variation from the Edmonds cookbook.

Note: this is not a sweet scone - the mix is plain, if you like a sweet scone you may add 3 Tblspns sugar in the dry ingredients stage.

1 cup flour
2 tspns baking powder
1 Tblspn of butter
pinch of salt
1/2 cup of currants
aprox 1/2 cup of milk
Sift the dry ingredients into a bowl

Cut or rub in the butter until it resembles fine breadcrumbs

Add enough milk to make a soft dough and shape into a circle on a lightly floured board. Roll out to roughly 1.5 cm (1/2 an inch) thick and cut into eight wedges.

Cook on a hot greased girdle, hotplate or frying pan until golden and cooked in the centre - this will be roughly 5 minutes on each side.

Snuggle them up on the girdle arranged in the same way you cut them.

When you turn your scone wedges place them gently on the hot surface and only turn once.
Serve hot from the pan, slathered in your favourite jam.

If You Don't Like Rubbing Butter Into Flour ......these are the scones for you
The recipe is from Dame Alison Holst - a New Zealand cooking icon. It is easily scaled - I made a half recipe but used a little more milk than half.Following is the recipe with a note from her;


My Mother’s Date Scones
No one could make scones better than my mother. They melted in your mouth. Sometimes, over a weekend, she’d make six batches of scones, feeding all and sundry.
2 cups high grade flour (bread flour) – spoon the flour into your measuring cup without packing it
½ tsp salt
2 level Tbsp baking powder
½ cup dates (chopped in half)
50 g butter (melted)
¾ cup milk

1. Sift dry ingredients into a medium sized bowl.
2. Add chopped dates.
3. Add milk to melted butter and stir into dry ingredients. Careful not to over-mix. Mixture should be lumpy.
4. Turn dough out onto a floured surface. Pat into a rectangle shape (work with dough as lightly as possible). Should make 6 to 8 good sized scones.
5. Spray oil onto a baking tray. Place scones closely together to the tray and bake at 225°C for 10 to 12 minutes, until tops are golden.

Tuesday, October 25, 2011


OCTOBER 2011 CHALLENGE


Povitica


The Daring Baker’s October 2011 challenge was Povitica, hosted by Jenni of The Gingered Whisk. Povitica is a traditional Eastern European Dessert Bread that is as lovely to look at as it is to eat!


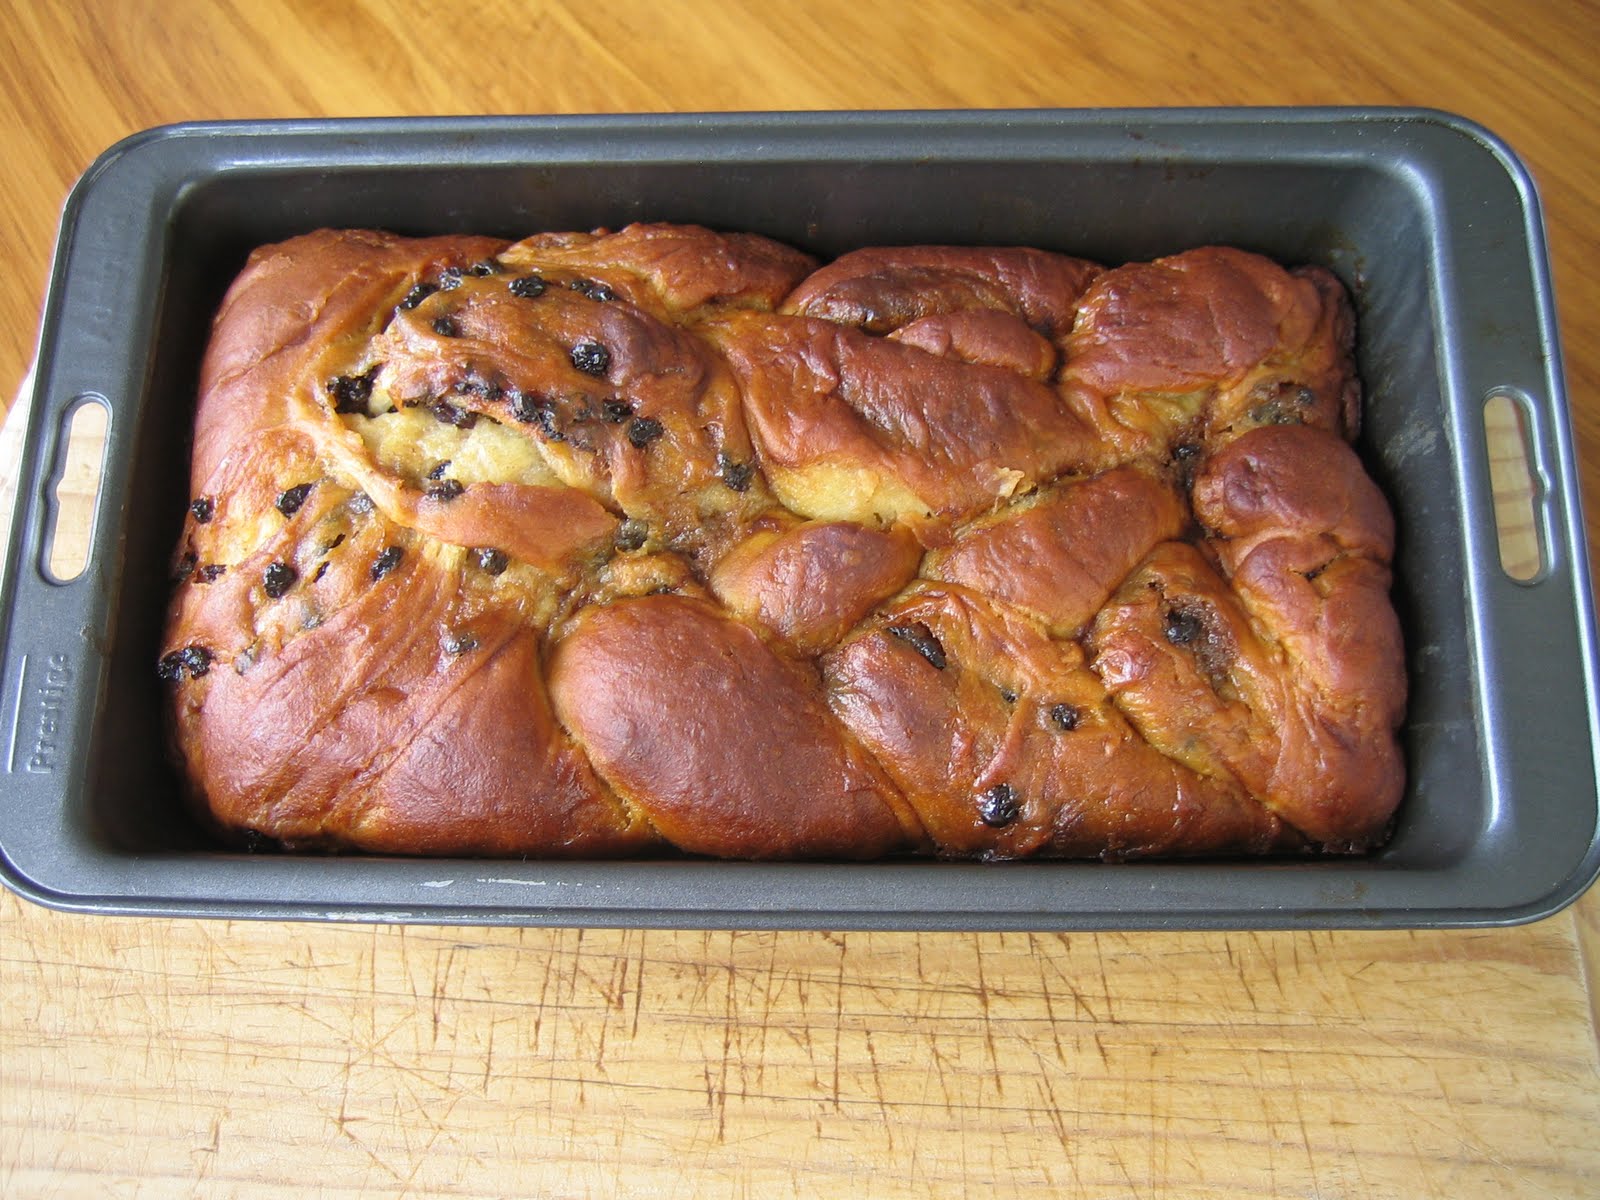
Here's my version of the Povitica. I filled it with my own homemade lemon curd and currant mixture made as per the walnut filling recipe. It was the quarter quantity recipe and I took the advice of some DB'ers and divided the dough into three and plaited it - hence the appearance of the loaf. It tastes great and even better toasted with butter.

Here is the link for the recipe http://thedaringkitchen.com/sites/default/files/u11/60_Povitica_-_DB_Oct_2011.pdf

Povitica is also called potica. Another Daring Baker says “ It seems that there are quite a few 'how to' videos on youtube under the name 'potica'! This is my favourite so far, not in English, but very cute:”
http://www.youtube.com/watch?v=i863PMMdtGM&feature=related


Thanks Jenni for a great challenge - everyday ingredients turned into something exotic !

Monday, September 26, 2011


THE DARING BAKERS’ SEPTEMBER, 2011 CHALLENGE: FRESH, FLUFFY, FRENCHCroissants !The Daring Bakers go retro this month! Thanks to one of our very talented non-blogging members, Sarah, the Daring Bakers were challenged to make Croissants using a recipe from the Queen of French Cooking, none other than Julia Child!

Due to one thing and another I got to the challenge pretty late this month.

All went well until the final rise – the one after the cutting and rolling – they just didn’t rise much that time.

However they seemed to cook well, were a lovely flakey and fluffy texture with a crispy crust. I could see the laminations/layers in the cooked dough. They just weren’t very big! Maybe I’ve just got used to the upsized mass produced ones I see in the supermarket. On reflection I’m not sure how big the sample ones were – so maybe these are about right.

Thanks for the challenge Sarah 

Friday, August 26, 2011

August 2011 Daring Bakers' Challenge:


Candylicious!
The August 2011 Daring Bakers’ Challenge was hosted by Lisa of Parsley, Sage, Desserts and Line Drive and Mandy of What the Fruitcake?!. These two sugar mavens challenged us to make sinfully delicious candies! This was a special challenge for the Daring Bakers because the good folks at http://www.chocoley.com offered an amazing prize for the winner of the most creative and delicious candy!


I made Jo's Fabulous Fudge. It's pretty much never fail and gorgeous to eat.
Jo Seagar is a wonderfully popular New Zealand chef and cook book writer, she also runs a cafe and cook school in the South island of New Zealand. Here is the recipe - "definitely not part of the daily diet - to be made for special occasions only " !!!

I made a half recipe and that makes 30 good sized pieces.

Jo’s Fabulous Fudge from Jo Seagar Cooks Random House 2006

• 800 g sweetened condensed milk
• 2 cups soft brown sugar, firmly packed
• 250 g butter
• 100 ml sugar syrup (liquid glucose or corn syrup)
• 3 tablespoons golden syrup
• 400 g white chocolate, chopped
• 1 teaspoon vanilla


Directions:
1.
Spray and line with non-stick baking paper, a 20 x 30 cm, quite deep (at least 4 cm) tin, or 2 smaller tins.
2.
Place all ingredients, except the chocolate and vanilla, in a large heavy based saucepan and stir over medium heat until the butter melts and the sugar dissolves. Bring to the boil and boil gently until it becomes very thick and changes colour to a dark caramel brown paper shade – about 6 minutes, to the soft ball stage, 116°C on a sugar thermometer. Stir often to prevent it catching on the bottom – I find a silicon spatula the best gadget to stir with. Remove from heat and stand until the bubbles subside. Stir in the chocolate and vanilla until melted and smooth.
3.
Pour into the prepared tin and smooth the surface. Cool to room temperature (about 3 hours) then refrigerate until firm. Cut into squares. Store in an airtight container in the fridge for up to 6 weeks – if you’re lucky.


Port and Prune Truffles


I made Port and Prune Truffles and dipped them in my attempt at tempered chocolate. The tempering process seemed to go to plan but did not stay shiny after it set. It did snap/crack nicely and tasted good. The filling is not a ganache but instead the prunes are simmered in port and mixed with chocolate cake crumbs and almond flavouring - very easy, quite economical and tastes stunning.


Port and Prune Truffles from The Australian Women's Weekly Light and Luscious SUMMERTIME Cookbook
These truffles will keep in the refrigerator, covered for several weeks.

½ cup finely chopped prunes
¼ cup port
1 ½ cups cake crumbs, lightly packed
¼ cup slivered almonds, finely chopped
¼ cup cream
¼ teaspoon almond essence

chocolate for tempering

1. Combine prunes and port in a small pan, bring to the boil, reduce heat, simmer uncovered for a few minutes or until all the liquid is absorbed, let cool for about 15 minutes.
2. Then combine prune mixture, cake crumbs, almonds, cream and almond essence together in a bowl, mix well and refrigerate for several hours or overnight. The mixture will be firm but not hard.
3. Shape teaspoons of the mixture into balls and place on a tray and refrigerate for at least an hour.
4. Prepare chocolate for dipping, line a tray with baking paper or foil, dip the balls into chocolate and place on tray to set.
5. Store in an airtight container